NetSuite, Implementation, Data Migration, QuickBooks
9 min Read
Introduction
This article is a comprehensive guide on importing journal entries in NetSuite using the CSV import template. The article discusses use cases for importing journal entries, the layout of a typical NetSuite journal entry form, the required fields, and how to map journal entry fields in the CSV template.
Whether new to NetSuite or seeking to import your first journal entry, this guide will help you efficiently import journal entries with the CSV import template.
This is part of an OptimalData series on CSV imports. See my overview article for more general tips on using NetSuite CSV templates.
This article will discuss historical financial statements and open transactions, provide a simple example, and provide resources to complete this process. This article is relevant for companies planning to load summary-level data. If you plan to load detailed historical transactions, this article will not apply.
Potential Use Cases for Importing Journal Entries
Before diving into the technical details, let’s consider some scenarios where importing journal entries with the CSV import template is helpful:
-
Historical Data Migration: When implementing NetSuite from QuickBooks or another system, importing historical journal entries ensures the ability to run historical financial statements.
-
Recurring Entries: Regularly occurring transactions, such as monthly accruals, payroll, or depreciation, can be imported via CSV to save time and reduce manual data entry.
-
Bulk Adjustments: When correcting errors or adjusting balances, importing journal entries streamlines the process.
Understanding the NetSuite Journal Entry Form
Before preparing your CSV file for import, it is essential to understand what a journal entry form is, the layout of a journal entry, and the required fields. Review the journal entry page in your NetSuite instance. One of NetSuite’s strengths is the ability to customize forms for your organization. Because of this, your instance might look slightly different.
Here is a screenshot of the example journal entry form I will walk you through:
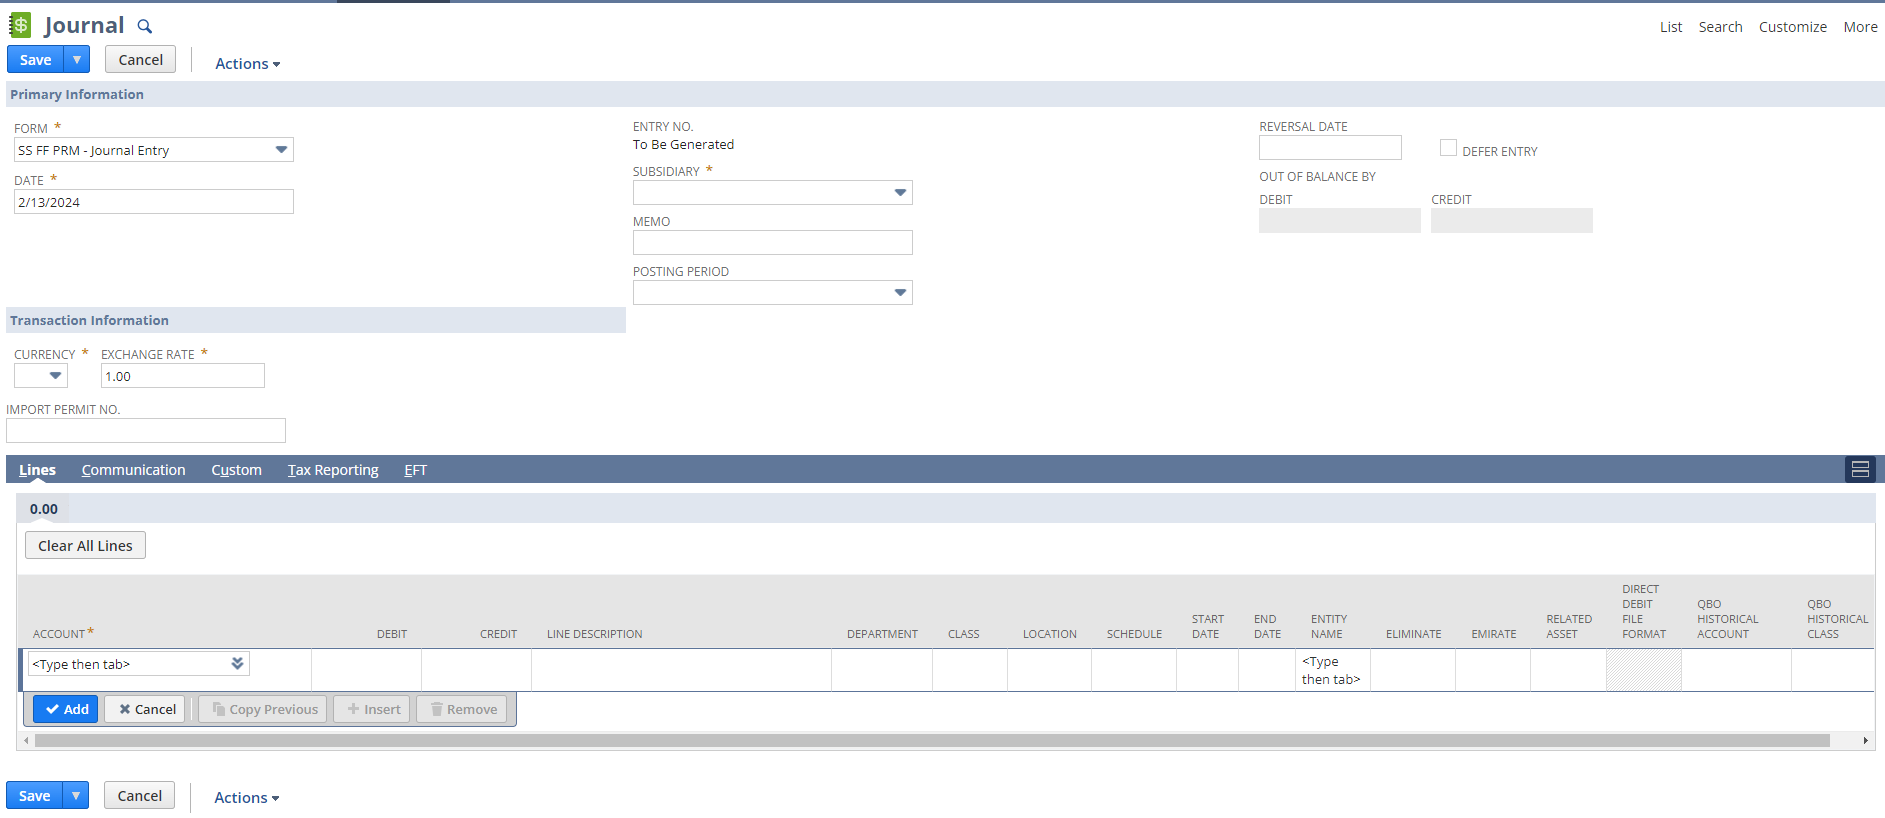
The Journal Entry Form
The view users see of journal entries in NetSuite is called a form. This is how administrators and implementation partners add custom fields, change the required fields, and change the placement of fields. In the screenshot above, the top left dropdown is where a user can change the form. It is critical to understand that the selected form drives the required fields on the user interface and in the CSV import status.
Typically, non-admin users won’t be able to change this. So, if you can’t see the option to change the form, you won’t be able to import journals with a different form.
Header-Level vs. Line-Level Data
Users should also understand the distinction between header-level and line-level data:
-
Header-Level Data: Contains information that applies to the entire journal entry, such as the date, memo, and subsidiary. This data appears once on the form, typically on the top portion of the page.
-
Line-Level Data: Represents fields on each line of the journal entry. Every line will have its account, department, debit, and credit amounts.
There is a one-to-many relationship between the header and the lines. Each journal entry header can have many lines. You can see that in the screenshot above. There are two journal entry lines on the journal entry.
Understanding this distinction determines how you format your import file in the CSV import template.
Journal Entry Fields
Now, let's discuss the fields in a journal entry. Every company will have different required fields. The asterisk will indicate if the field is required. Include a column in the CSV import template if a field is required.
Here are some standard header fields:
-
Subsidiary: The subsidiary is the first field you should complete. Standard journal entries can only impact a single subsidiary. Use an advanced intercompany entry to post to multiple journal entries.
-
Date: The transaction date of the journal entry.
-
Reversal Date: Enter the reversal date if this is a reversing entry.
-
Period: The posting period in which the journal entry’s GL impact will be included. See my article on the date and period for additional details.
-
Currency: If applicable, include the currency code. The default currency is based on the subsidiary’s reporting currency.
-
Exchange Rate: Defaults to 1 if you select the subsidiary’s reporting currency. Otherwise, it will use the exchange rate from the system.
-
Memo: A brief description of the entry. This field is called the Memo (Main).
Here are some standard line fields:
-
Account: The account affected by the entry (e.g., “Accounts Receivable”).
-
Department/Class/Location: The appropriate segment value assigned to the entry line.
-
Debit Amount and Credit Amount: Specify the amounts for each account. You can only select the debit or the credit amount, not both.
-
Memo/Description: A line-level description on the entry line.
-
Name: Assign an entity name on the entry line. If you are posting to an Accounts Receivable or Accounts Payable line, it's best practice always to add a name. You can include a name on accrual entries to validate the completeness of your accruals.
Mapping Journal Entry Fields in the CSV Template
Once you understand the field layout for your journal entry form, you can prepare the CSV file. You have a few options on where to start:
-
You can use the import template provided by your implementation partner
-
You can purchase OptimalData’s transactional CSV guide for $50, which includes a guided layout.
-
You can open a new Excel file and manually add the abovementioned columns.
Preparing the CSV template with your data should be the hard part. Take your time, and make sure you populate the required fields.
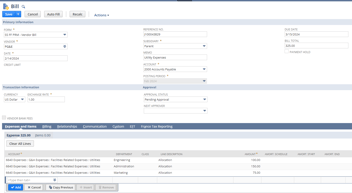
Below is a completed journal entry import example. You can see that the header-level fields all repeat on the line-level fields.

Mapping based on the Internal ID vs. the Name
Some journal entry fields, like GL account or subsidiary, depend on another existing NetSuite list. When you are preparing and mapping these values, NetSuite gives you the option to map them based on the record:
-
Name
-
Internal ID
-
External ID
Let's use a GL account as an example. The first line of our journal entry will be mapped to account 1130 - Other Receivables. If we were going to map this in our file, here is what each would look like:
-
Name: Accounts Receivable: Other Receivables
-
Internal ID: 125
-
External ID: Blank value; can’t be used

Because the Other Receivables account is a child, you must include the parent's name in the Name. Otherwise, the import will fail. The internal ID, however, is a single number that can never change, so I find it much easier to map to. You can use an Excel XLOOKUP to add the internal ID to your spreadsheet.
See step 1 in this article to expose the internal ID on all the lists in NetSuite.
Single vs. Multi File Import
NetSuite allows users to import journal entries as a single file, with both the header and line-level data in a single file, or as two files, one for the header-level data and one for the line-level data. If you use two files, you must assign an ID that links each line to a corresponding header-level line.
I prefer using the single-file approach for my data migration services. It's one less file to maintain, and I’m unsure of the benefit of using two files. However, the decision depends on the source data.
The Field Mapping when Importing a Journal Entry
On the Field Mapping step of the CSV Import Tool, you will assign the column names in your spreadsheet to the corresponding field in NetSuite. The CSV file column names are in the left window, the mapping section is in the middle window, and the NetSuite field names are in the right window. Mapped fields share a row in the middle.
Below is a screenshot of the field mapping for my journal entry.

Here are a few considerations and observations:
-
Users can collapse the header-level vs. line-level fields on the right side.
-
The line-level fields always start with the “Journal Entry - Line” prefix.
-
NetSuite will attempt to map the fields automatically based on the name. But be sure to check the mappings. They aren’t 100% accurate.
-
I always recommend mapping based on the internal ID, not the name.
-
Any mapped field from your spreadsheet will have a green checkmark to indicate it has been mapped.
Importing Multiple Journal Entries
You must include the entry number or external ID on the header-level data if importing more than one journal entry. Here’s why: NetSuite uses these fields to distinguish between entries. If you don’t map either of these fields, you’ll get this warning message at the end of the Field Mapping step:
“You have not mapped a field to be a unique transaction identifier, so this file’s data will be imported as a single journal entry. If this is incorrect, please go back and correct your mapping and data file. You can choose the Entry No., External ID, or Internal ID field as a unique identifier.”
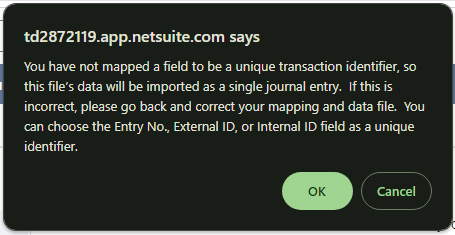
This error tells the user that NetSuite can’t identify each transaction. If you intend to load multiple transactions, you made a mistake and need to update your CSV import file.
Additional Considerations
Here are some additional considerations to factor into your journal entry imports and reporting on journal entries:
-
You need to turn off the auto-numbering to set the document number on the entry. Otherwise, NetSuite will overwrite this with the auto-generated number. You can still use the document number to delineate between entries, even if you plan to use NetSuite’s auto-generated numbering system.
-
NetSuite tracks if the journal entry was created via CSV on the “Context” column in the system notes subtab.
-
Many clients have journal entry approval workflows configured in their NetSuite environment. When importing journal entries, be sure to test that the workflow in the sandbox is working as expected before loading live entries.
Conclusion
In conclusion, importing journal entries in NetSuite using the CSV import template can benefit various use cases such as historical data migration, recurring entries, and bulk adjustments. Understanding the journal entry form, distinguishing between header-level and line-level data, and mapping the fields correctly are crucial steps in the process. By following the guidelines provided in this article, users can streamline their journal entry imports and ensure accurate and efficient financial record-keeping in NetSuite.
Here are some other ways I can help you if this article was helpful:
-
Sign up for my accounting saved search course
-
Hire me to complete the required NetSuite implementation data migration. Contact me for a free quote.
-
Check out my CSV tool overview article.


.png?width=352&name=NetSuite%20CSV%20Import%20Tool%20(1).png)