NetSuite, Reporting, Accounts Payable
January 10, 2024
4 min Read
Are you looking for tips, tricks, and how-to articles on reporting in NetSuite? Check out our NetSuite Reporting Resource page or sign up for my NetSuite saved search course for accountants.
The accounts payable (AP) team is frequently asked for the status of an invoice, the payment date, the coding for a specific invoice, and other questions about AP activity. Utilizing a NetSuite saved search is a perfect use case for helping answer these vendor questions quickly. Saved Searches are one of my favorite features of NetSuite. Today, I will walk through a transaction saved search to get answers to vendor activity questions.
First, navigate to Reports -> New Search. Select Transaction Search from the list. Once selected, a blank transaction search screen should appear. Click the 'Create Saved Search' button on the top.
"I use this search all the time for reviewing accounts payable during the check run."
- OptimalData client
From here, we will select the filters to get the data we need from the Criteria section:
-
Type: The type dictates the type of transaction. Select 'Bill,' 'Bill Credit,' and 'Bill Payment'
-
Account: The transaction account coding. Each transaction hits two accounts (debit and credit). Since we don't want to see each transaction twice and every transaction type will have an Accounts Payable line, we set a filter to see all transaction lines not hitting the Accounts Payable account.
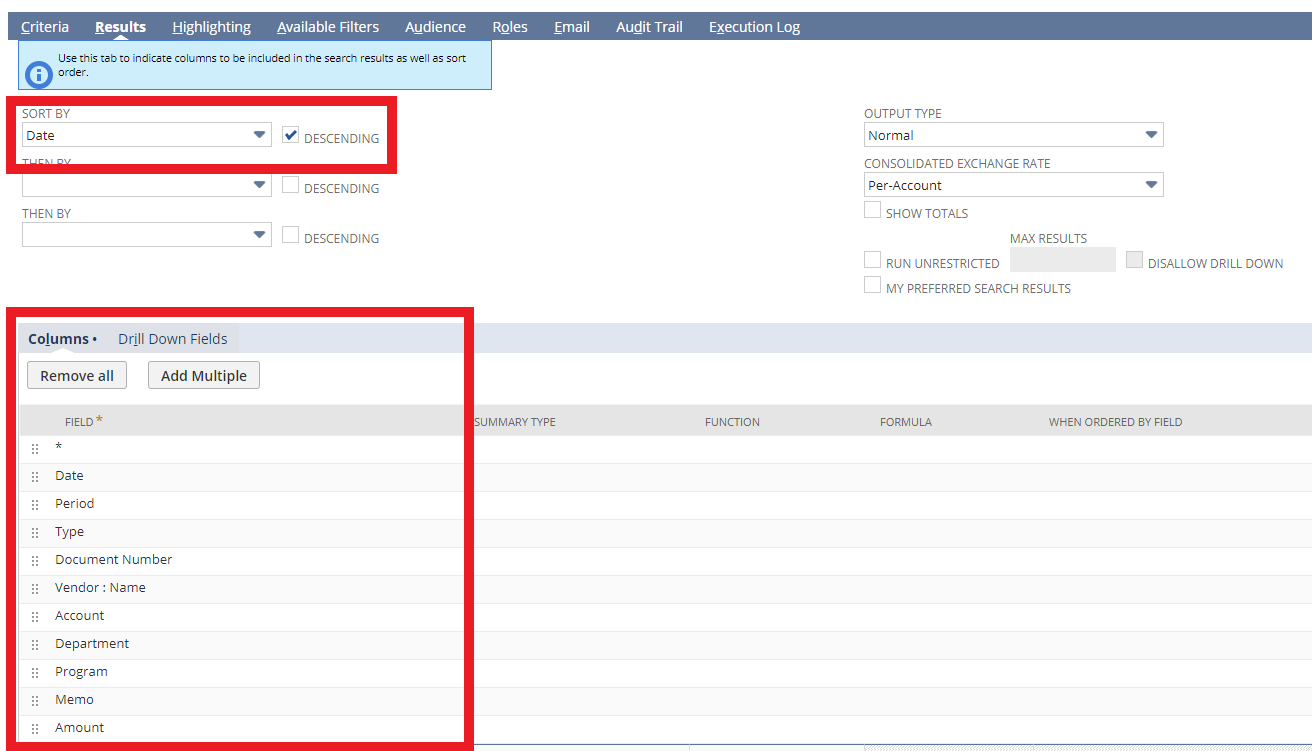
Navigate to the Results subsection. We dictate what the search results should return in this section. Sort the transactions by Date, with the Descending box checked. The fields we want to return are:
-
Date: The transaction date (this is when the transaction hits the sub-ledger).
-
Period: The transaction posting period (this is when the transaction hits the general ledger).
-
Type: The type of transaction. In our search, we should only see the transaction types we filtered for from above.
-
Document Number: The invoice, check, or credit memo numbers.
-
Vendor Name: The vendor in the transaction. To find this field, scroll to the bottom of the field option drop-down and select 'Vendor Fields…'. From here, select Name. I'd highly recommend adding this saved search formula to get the Name to appear on both the header and line results.
-
Segment Fields: Any segments in your NetSuite account. This might be the general ledger account, department, and program/class for biotech teams.
-
Memo: The memo detail is associated with the transaction line.
-
Amount: The transaction amount.
Finally, we add filters to the report to allow users to refine their search. The filters remove the need to edit the saved search directly. Let's include the following filters:
-
Name: Allowing users to filter transactions by a specific vendor.
-
Chart Fields: Allowing users to filter based on a specific department or program.
-
Type: Allowing users to filter based on specific transaction types.
When adding these filters, select the 'Show in Filter Region.' Also, choose 'Show as Multi-Select' to allow users to select multiple criteria.

Finally, add an appropriate Search Title and click Save. You now have a saved search for querying vendor activity. Here is what the saved search should look like:
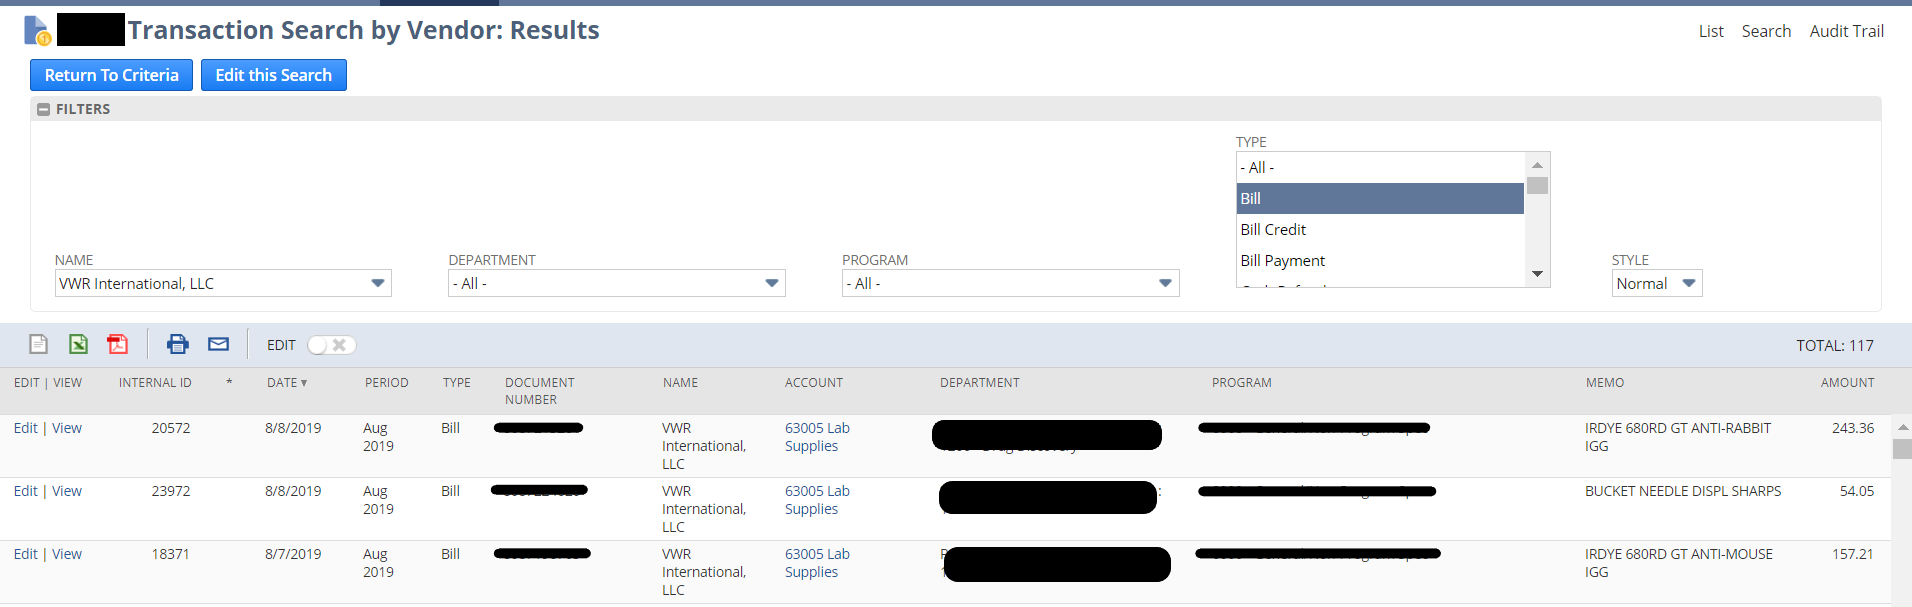
I recently built this saved search for one of my clients. A few weeks later, the client said: "I use this search all the time for reviewing accounts payable during the check run." If you or your team want to gain more efficiencies with NetSuite's Saved Search, send us a note at info@optimaldataconsulting.com. We specialize in helping accounting teams optimize their accounting software infrastructure.